Causes of carpal tunnel syndrome
- Unilateral overloading of the wrist causes swelling.
- Swelling caused by an accident or fall on the wrist.
- Swelling caused by rheumatic disorders.
- If someone retains fluid, as for example during pregnancy or with certain disorders such as a slow-working thyroid gland.
- Swelling caused by obesity or diabetes.
Symptoms of carpal tunnel syndrome
- Dull, tingling and painful feeling in the hand and fingers
- Reduced strength in the fingers.
- Complaints often increase at night.
- Alternating numbness in the tips of the thumb, index and middle fingers.
- Tingling sensation in the skin around the nervus medianus.
- Pain in the wrist.
Get started with these items to tape CTS
-
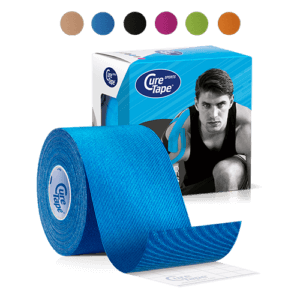
CureTape® Classic Kinesiology Tape
Bestseller $20.95
In stockSelect options This product has multiple variants. The options may be chosen on the product page
$20.95
In stockSelect options This product has multiple variants. The options may be chosen on the product page -
CureTape® Sports Extra Sticky Kinesiology Tape
 $22.50
In stockSelect options This product has multiple variants. The options may be chosen on the product page
$22.50
In stockSelect options This product has multiple variants. The options may be chosen on the product page -
CureTape® Art Printed Kinesiology Tape
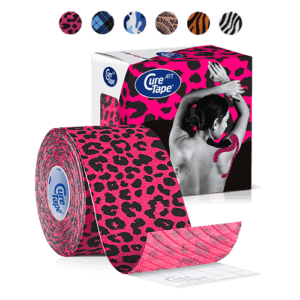 $22.50
In stockSelect options This product has multiple variants. The options may be chosen on the product page
$22.50
In stockSelect options This product has multiple variants. The options may be chosen on the product page -
Standard scissors
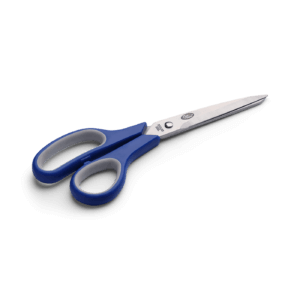 $21.95
In stockAdd to cart
$21.95
In stockAdd to cart
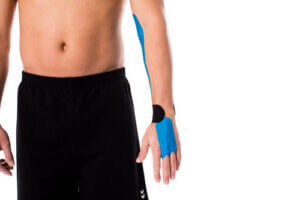
How to tape carpal tunnel syndrome?
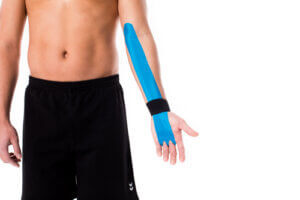
If carpal tunnel syndrome is recognised at an early stage, it can be treated with CureTape. A combination of muscle tape and ligament tape is used to apply the tape. In an acute stage, taping can also be used as a painkiller.
In order to relieve the forearm flexors (sedation), a blue I-tape is used in this example (m. palmaris longus).
Instruction video: Taping carpal tunnel syndrome
Professional instructions
- Measure the I-tape in stretched position, taking into account a tape construction that starts at the back of the hand.
Then cut two finger recesses from the I tape as indicated. - Tear the release paper at the finger recesses in half and fold the paper in half on both sides. Slide the middle and ring fingers through the cutouts and place the base on the back of the hand held in a neutral position.
- Turn the hand outward, bringing the hand into dorsiflexion.
- Apply the detonating tape with slight stretch towards the medial epicondyle humeri over the flexors of the forearm and rub in, applying the last 5 cm of the tape without stretching.
- Then apply the black tape to create space by relieving the hand joint with a ligament technique.
- Apply the tape with maximum stretch to the midsection of the hand joint, ensuring that the tape ends are applied very gently and without additional stretch, otherwise tingling may occur.
Instructions for self taping (non-professionals)
- Start by measuring the I-tape when it’s stretched, making sure it starts at the back of your hand. Then, cut two finger holes in the tape as shown.
- Tear the paper at the finger holes in half, then fold the paper on both sides. Slide your middle and ring fingers through the holes and place the tape on the back of your hand in a neutral position.
- Turn your hand outward so your fingers point upwards.
- Put the tape on with a bit of stretch towards the inner part of your elbow over the muscles on the front of your forearm. Rub it well to activate the adhesive layer, leaving the last 5 cm without stretching the tape.
- Next, put on the black tape to create some space in your hand joint using a special technique.
- Stretch the tape as much as you can over the middle of your hand joint. Be careful not to stretch the ends too much, or you might feel a tingling sensation.


Christina’s advice when taping your hand
When taping your hands, it’s crucial to choose a tape that provides strong adhesion and support. That’s why I recommend CureTape kinesiology tape. Because tape is applied on the hand, it may come off sooner due to sweat or friction. Therefore, opt for our extra sticky CureTape Sports tape variant!
Learn how to tape
Want to learn how to apply tape yourself*? Check out our manuals on taping:
- The Ultimate Taping Guide: Focuses on self-taping for the 30 most common injuries where taping provides support.
- Kinesiology Taping Method Manual: Designed for (para medical) professionals, covering basic taping techniques and various pathologies.
- Decompressive Taping Techniques Manual: Specifically focuses on lymphatic taping methods for decompression.
What are you waiting for? Order a copy today!
THYSOL is the manufacturer of the kinesiology tape brand CureTape. As CureTape, we have been training and supplying professionals for 25 years. And consumers now know how to find us too! By manufacturing all our tapes in our own factory, we can guarantee the best quality!
Please note that the indicated tape applications and information on our website about the possibilities with kinesiology tape have not yet been scientifically proven. The statements and examples mentioned are based on long-term experiences of patients and trained therapists.Contraindications not to tape: pregnancy, open wounds, broken bones, unexplained complaints, allergies and skin diseases, use of medication such as blood thinners, thrombosis and fever. Always apply tape in consultation with a specialist.