Applying CureTape kinesiology tape can help relieve pain, support overworked muscles, and promote faster recovery. While the name suggests it’s caused by golf, this injury is commonly linked to activities like bodybuilding, chopping, water skiing, bricklaying, carpentry, squash, and prolonged computer work. Symptoms are most common in individuals aged 40 to 60 and may also be referred from the neck or shoulder. A qualified professional can assess and treat underlying causes if necessary.
Golfer’s elbow symptoms
- Pain on the inside of the elbow (often 1 to 2 cm below the protruding bone).
- Sharp pain during an activity, especially when the forearm is turned inward.
- Forearm can feel tight and look swollen.
- Pain, fatigue and stiffness in the arm, especially in the morning.
- Pain can refer to the upper arm, shoulder, forearm, wrist and hand.
- The symptoms are usually exacerbated when lifting objects or stretching the wrist.
In addition to assessing for the mentioned symptoms, the therapist will also perform strength and movement tests to determine if the complaint is golfer’s elbow.
The following questions are important here, does pain occur if:
- The elbow is bent and the hand is moved toward the back of the forearm.
- The therapist actively bends the wrist for the client.
- The fingers are bent while simultaneously flexing the wrist in the direction of the palm.
- The patient or yourself is picking up objects.
Get started with these items to tape golfer’s elbow
-
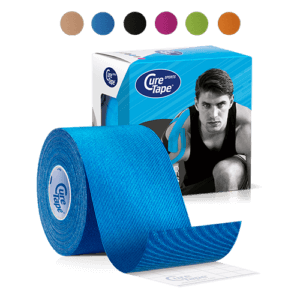
CureTape® Classic Kinesiology Tape
Bestseller $20.95
In stockSelect options This product has multiple variants. The options may be chosen on the product page
$20.95
In stockSelect options This product has multiple variants. The options may be chosen on the product page -
CureTape® Sports Extra Sticky Kinesiology Tape
 $22.50
In stockSelect options This product has multiple variants. The options may be chosen on the product page
$22.50
In stockSelect options This product has multiple variants. The options may be chosen on the product page -
CureTape® Art Printed Kinesiology Tape
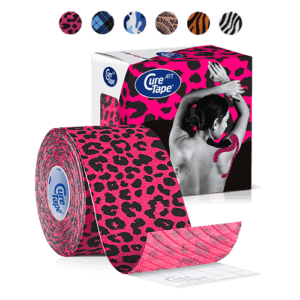 $22.50
In stockSelect options This product has multiple variants. The options may be chosen on the product page
$22.50
In stockSelect options This product has multiple variants. The options may be chosen on the product page -
CureTape Soft Touch Scissor
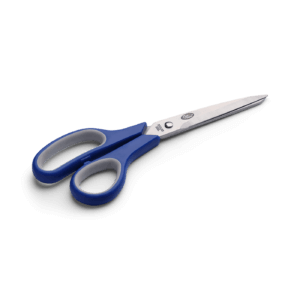 $21.95
In stockAdd to cart
$21.95
In stockAdd to cart

Christina’s advice when taping your arm
When taping your arm, it’s crucial to choose a tape that provides strong adhesion and support. That’s why I recommend CureTape kinesiology tape. For regular use, CureTape Classic or Art is ideal. However, if you’re engaging in extreme sports or swimming, opt for the extra sticky CureTape Sports variant!
How to tape golfer’s elbow video
Tips for Effective Arm Taping:
- Make sure you understand what’s causing the pain or discomfort
- Check if there are any reasons why taping might not be a good idea.
- Before you start, read the instructions carefully.
- Choose a tape colour or print that suits your style!
- Round of all the edges to prevent peeling.
- Avoid stretching the tape at the beginning and end.
- Rub the tape firmly for better adhesion; warmth helps activate the adhesive.
- You can shower or swim with the tape on; just pat it dry gently afterward, avoiding vigorous rubbing.
- To remove the tape easily, use body or massage oil.
Instruction
Tape
Shape:1 customised I-Tape, 1 normal I-Tape.
Number of strips: 2.
Technique: muscle technique (slight pull).
Measuring and cutting the tape
Step 1:
Step 2:
Step 3:
Step 4:
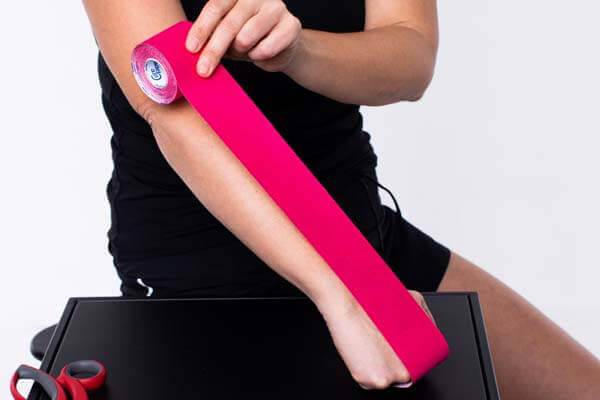
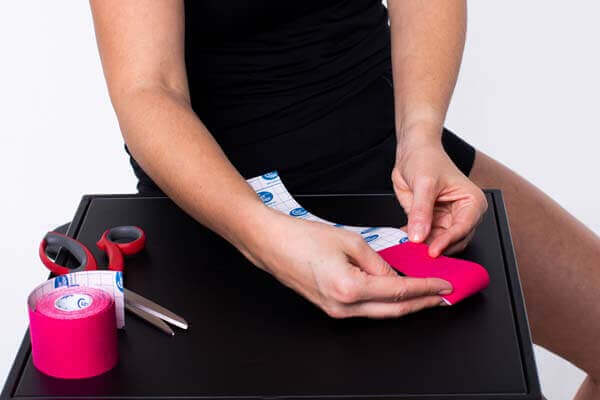
- Sit at a table and measure the first tape in a prone position from the back of the hand, to above the inside of the elbow, making a fist with the elbow extended.
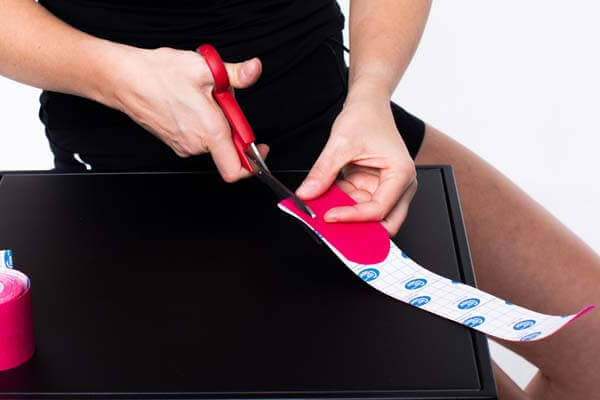
- To apply the tape, fold one end in half and cut two holes at the level of the fold.
- For the second tape, measure the distance from the elbow to the centre of the inside of the forearm.
How to tape golfer’s elbow
Step 1:
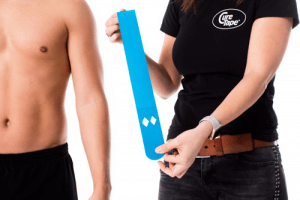
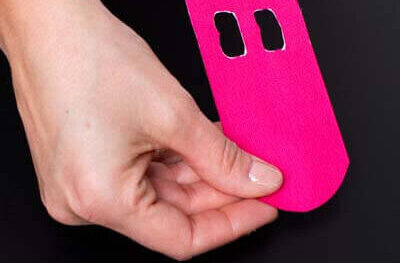
To relieve the forearm flexors, a blue I-tape is used in this example (m. Palmaris longus). Measure the I-tape in the stretched position, taking into account a tape construction that starts on the back of the hand. Then cut two finger recesses from the I-tape as indicated.
Step 2:

Tear the paper backing at the location of the finger holes in half, then fold the paper in on both sides. Slide the middle and ring fingers through the holes and place the base on the back of the hand that is held in a neutral position. Remove the backing of the shorter bit of tape and lay with no stretch over the dorsal (top) aspect of the hand. Remove the backing to the second longer part of the tape and lay in the direction towards the medial elbow.
Step 3:
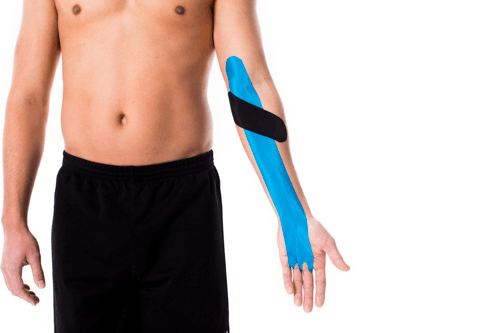
- A black tape is used for activating the m. Pronator. The m. Pronator ensures that the hand is turned inwards.
- Apply the base of the I tape with a straight arm to the medial epicondyle.
- Apply the kinesiology tape towards the muscle insertion as shown in the video.
Check the taping application by moving the taped wrist and noting for any discomfort. If the pain is reduced and no discomfort with the tape applied can be felt, the taping is completed successfully. This tape application can also be used for posture correction or RSI.
Instructions for self taping (non-professionals)
Step 1:
We’ll use a blue I-shaped tape to help relax the muscles in your forearm (the muscles that help you bend your wrist). Start by measuring the tape while it’s stretched out, and make sure to cut two finger-sized holes in it. These holes will help you put it on easier.
Step 2:
After cutting the holes, tear the paper backing halfway through at those holes. Then, fold the paper on both sides and slide your middle and ring fingers through the holes. Place the tape on the back of your hand while keeping it flat. Peel off the shorter piece of backing and stick it without stretching over the top of your hand. Then, remove the backing from the longer piece and stick it towards your elbow.
Step 3:
Now, we’ll use a black tape to help activate another muscle in your forearm (the one that turns your hand inwards). Place the base of the tape on the inner part of your elbow with your arm straight. Stick the tape in the direction towards your wrist muscle, as shown in the video.
After taping, try moving your wrist around. If it feels better and there’s no discomfort from the tape, then it’s done! This taping method can also be helpful for fixing your posture or relieving pain from repetitive strain injury (RSI).
Learn how to tape
Want to learn how to apply tape yourself*? Check out our manuals on taping:
- The Ultimate Taping Guide: Focuses on self-taping for the 30 most common injuries where taping provides support.
- Kinesiology Taping Method Manual: Designed for (para medical) professionals, covering basic taping techniques and various pathologies.
- Decompressive Taping Techniques Manual: Specifically focuses on lymphatic taping methods for decompression.
What are you waiting for? Order a copy today!
THYSOL is the manufacturer of the kinesiology tape brand CureTape. As CureTape, we have been training and supplying professionals for 25 years. And consumers now know how to find us too! By manufacturing all our tapes in our own factory, we can guarantee the best quality!
Please note that the indicated tape applications and information on our website about the possibilities with kinesiology tape have not yet been scientifically proven. The statements and examples mentioned are based on long-term experiences of patients and trained therapists.Contraindications not to tape: pregnancy, open wounds, broken bones, unexplained complaints, allergies and skin diseases, use of medication such as blood thinners, thrombosis and fever. Always apply tape in consultation with a specialist.